OctoPrint Setup: A Guide to Managing Your 3D Printer Remotely with Raspberry Pi
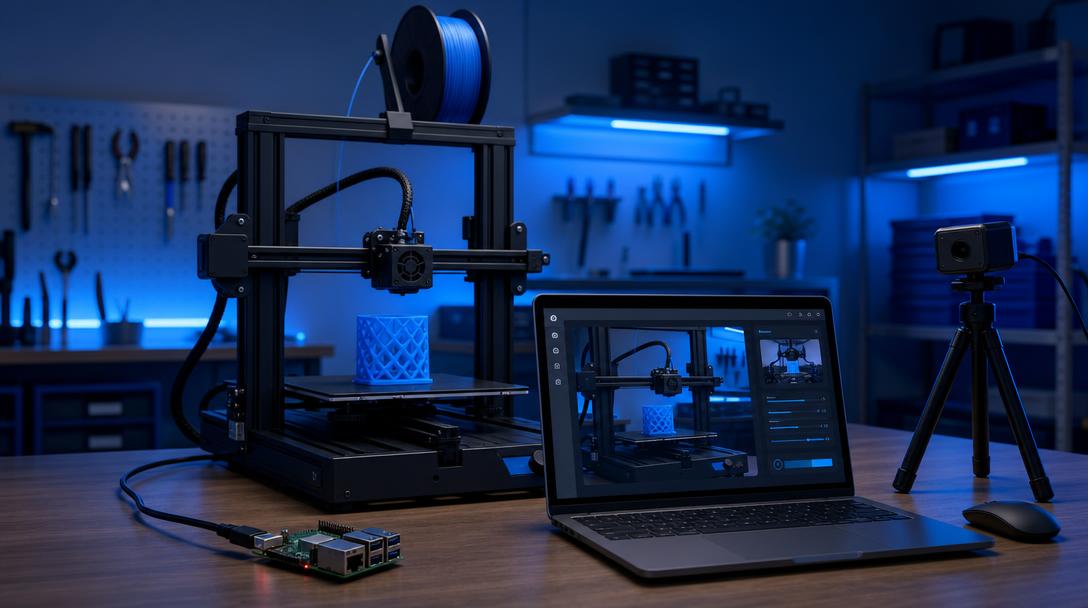
OctoPrint setup allows you to manage an FDM 3D printer connected via USB without having to wait beside your computer. With OctoPrint installed on a Raspberry Pi, you can send files, start prints, monitor temperatures, and remotely follow the production process with a suitable camera.
What Is OctoPrint Used For?
OctoPrint is open-source software that acts as an intermediary between your 3D printer and your computer or network. Instead of using the printer’s own screen and storage card, it helps you send G-code files over the network. This allows you to transfer a model prepared in your slicer to the Raspberry Pi and start the print from a browser.
This system is particularly useful for long prints. Instead of staying beside the printer, you can control the bed and nozzle temperatures through the browser interface, view the progress percentage, and pause the print when necessary. However, remote control does not replace the printer’s safety features; it is important to supervise the first attempts.
What You Need for the Installation
- Raspberry Pi 3, 4, or a similar model
- A compatible and reliable microSD card
- Raspberry Pi power adapter
- An FDM 3D printer that can be connected via USB cable
- A network connection; stable Wi-Fi or Ethernet if possible
- An optional USB camera for monitoring the print
When choosing a Raspberry Pi, pay attention not only to processing power but also to the stability of the power supply and connection reliability. A connection drop during printing can cause the file to stop midway or result in delayed control. If you plan to use a camera, stable video transmission and a low processing load may be more practical than high resolution.
Step-by-Step OctoPrint Installation
- Download the OctoPi image: Obtain the OctoPi image prepared for Raspberry Pi or an up-to-date operating system image from the official source.
- Write it to the microSD card: Transfer the image to the card using Raspberry Pi Imager or a similar tool. Configuring settings such as the network name, password, and device name before writing the image will make the installation easier.
- Start the Raspberry Pi: Insert the microSD card, connect the power, and wait for the device to connect to the network.
- Open the web interface: From a computer on the same network, go to the Raspberry Pi’s local address. Create a user account in the initial setup wizard and define the printer profile.
- Connect the printer via USB: Start with the baud rate and serial connection options set to automatic. If the connection is not established, try a different USB port or cable.
- Run an initial test print: Load a small and simple model to check the temperature, movement, and emergency stop functions.
Tips for Safe and Trouble-Free Use
Instead of leaving OctoPrint directly exposed to the internet, it is safer to use it only on a trusted local network. If remote access is required, use a strong password, up-to-date software, and a secure VPN approach. Do not forget to change the default passwords for camera plugins as well.
To reduce connection drops, connect the Raspberry Pi to the printer with a short, high-quality USB cable. Operating system settings that disconnect USB connections to save power, as well as loose ports, can cause problems during printing. Also make sure that the Raspberry Pi does not overheat.
Your printer should have safety measures such as thermal runaway protection, the correct fuse, and a physical emergency stop. The software stop option alone does not provide sufficient protection in the event of an electrical or mechanical failure. For periodic checks of your FDM printer, you can also follow the 3D printer maintenance checklist.
OctoPrint provides a practical layer that simplifies file management for prototype, spare-part, and functional fixture prints. For custom enclosures and mounting parts used in electronics and IoT projects, you can explore electronics and IoT 3D printing solutions. When you want to produce a ready-made part using professional FDM, you can share your project through the 3D printing service.



 Türkçe
 العربية
 Русский
 فارسی
فارسی Deutsch