Switching to Klipper: What to Watch Out For When Migrating from Marlin
Marlin has proven its reliability for years as the most widely used open-source firmware in the 3D printing world. In recent years, however, Klipper has been spreading rapidly thanks to its speed and precision advantages, especially among users working with ABS and engineering-grade materials. So what hardware requirements, software steps and pitfalls await you when switching to Klipper from Marlin? In this article we cover the migration process step by step and objectively.
What Does Klipper Promise?
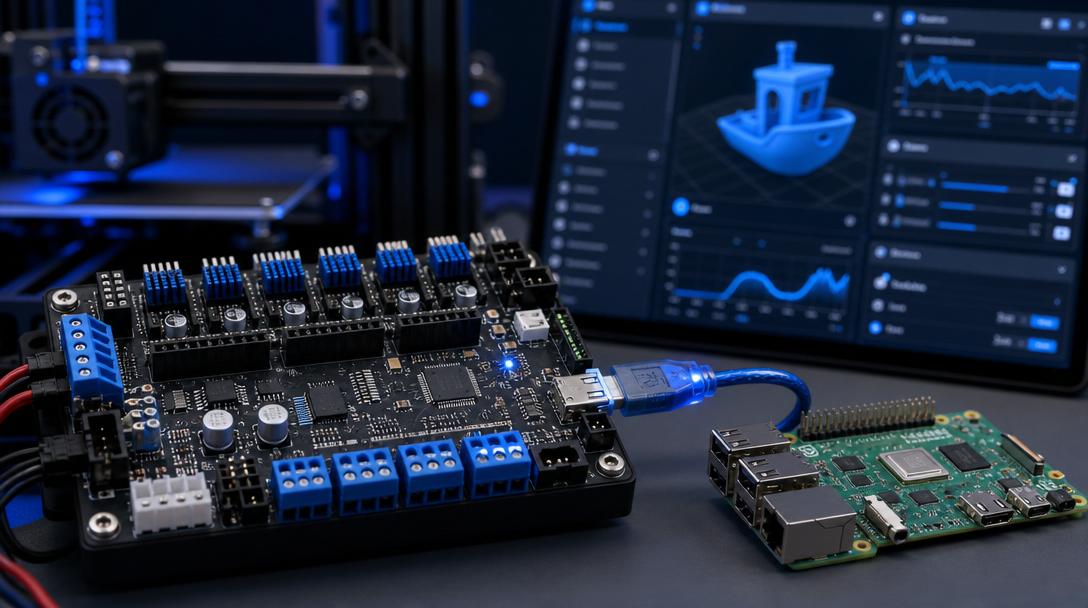
Klipper offloads motion calculations to a Raspberry Pi or another Linux device, reducing the microcontroller on the printer’s mainboard to nothing more than a signal sender. Thanks to this architecture, precise motion control becomes possible at much higher speeds (150-300 mm/s and above). Advanced features such as input shaper and pressure advance are natively supported in Klipper. This offers a significant advantage especially for workshops that want to print large parts in a short time. Klipper also brings modern features such as managing the printer from a browser via a web interface (Mainsail or Fluidd), watching a camera stream and saving print history.
Hardware Check Before Migrating
Before switching to Klipper, make sure you have the following hardware:
- A Linux device: A Raspberry Pi 3B+ or Pi 4/5 is considered standard. A Pi Zero 2W is also sufficient for basic operations, but the web interface may run more slowly.
- USB or UART connection: Most mainboards can connect via USB. SKR Mini E3, Manta and most Creality boards are directly supported.
- A compatible mainboard: Klipper supports almost any mainboard based on ATmega, ARM Cortex (STM32, LPC, RP2040). You only need to find out your mainboard’s processor model and check it against the Klipper support list.
- A stable power supply: If the Raspberry Pi shares the same power supply as the printer, you may experience fluctuations. Using a separate 5V adapter is more reliable.
Installation Steps
The Klipper installation may look a little complicated the first time around, but once you follow the steps you will see that it is a fairly logical process:
First, you need to install Klipper on the Raspberry Pi. The KIAUH (Klipper Installation And Update Helper) script is the most practical way to do this and installs Klipper, Moonraker, Mainsail or Fluidd with a single command. Next, you need to select the correct microcontroller for your printer’s mainboard, compile the firmware and flash it to the board. This step is far simpler than setting up a build environment as in Marlin, because Klipper’s make menuconfig interface only asks for basic information such as the processor type, communication speed and connection pins. Once the firmware has been flashed to the board and the Raspberry Pi connection is established, it is time for the printer.cfg file.
printer.cfg: The Heart of Klipper
The printer.cfg file is where you define your entire printer configuration as text. Everything you did in Marlin’s Configuration.h is done here in a clear, readable format. The most important step is to start with a sample printer.cfg file suited to your own printer. The Klipper GitHub repository contains ready-made configurations for most popular mainboards and printer models. Using this file as a base, you need to update values specific to your own printer, such as stepper motor current, axis directions, endstop positions and the temperature sensor type.
Common Mistakes During Migration
The most frequently encountered issues when migrating from Marlin to Klipper are:
- Wrong stepper direction or current: Don’t forget to invert the dir_pin value with ! in printer.cfg. If you enter current values differently from Marlin, the motors can overheat.
- Thermistor type error: A thermistor that works correctly in Marlin is defined with a different detection series in Klipper. Make sure you select the correct sensor_type value.
- Endstop logic: The normally open/closed endstop logic you are used to from Marlin is set with ! (invert) in Klipper.
- Trying high speed on the first test: Even though Klipper promises high speeds, it is safer to run your first prints at low speed (40-50 mm/s) to rule out mechanical issues.
Although the migration process may look complicated at first glance, it is a task you can complete in a single evening if you follow the right steps. If you want to benefit from Klipper’s speed and quality advantages but don’t want to deal with the setup, you can upload your project to us with our instant price calculator and receive fast, precise FDM printing produced with our professional equipment.
For more detailed information about Klipper and printer maintenance tips, take a look at our 3D printer maintenance guide and our Klipper vs Marlin comparison.


 Türkçe
 العربية
 Русский
 فارسی
فارسی Deutsch