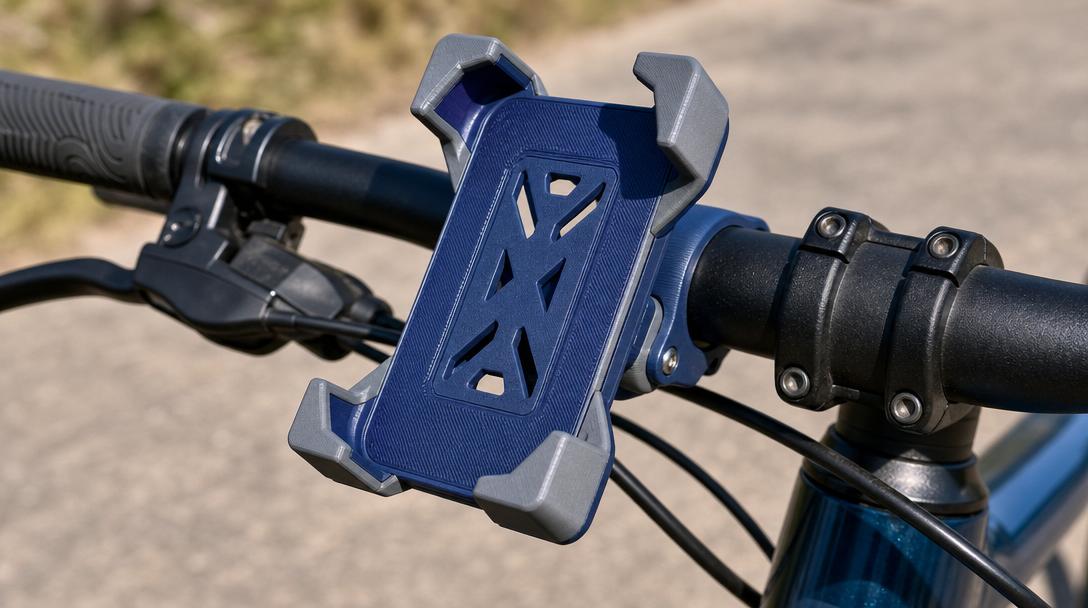
3D Printed Bicycle Phone Holder for Bike and Scooter: Handlebar Mount Design Guide
Having your phone securely visible while riding a bicycle or electric scooter offers great convenience for navigation tracking and quick access. Finding a suitable holder for every model on the market isn’t always possible, or existing products may not fully meet your needs. That’s where 3D printing comes in: by designing your own bicycle phone holder, you can create a solution that is both perfectly compatible with your vehicle and fits your budget. What’s more, with 3D printing you can add custom size and angle adjustments not found in commercial products, obtaining a mount that is fully compatible with your phone model.
Choosing Durable Materials for Outdoor Use
Keep in mind that a mount used on a bicycle handlebar will be exposed to sun, rain, and vibration. Standard PLA filament starts to soften at around 55-60 °C, making it unsuitable for a holder left in direct sunlight during summer heat. Instead, durable materials such as PETG or ASA should be preferred. PETG offers a popular choice for outdoor parts with its UV resistance and impact strength, while ASA is ideal for long-lasting handlebar mounts thanks to its superior UV resistance. You can check our engineering materials page to choose the most suitable material for your needs.
Critical Design Points: Tolerance and Print Orientation
One of the most important steps when designing a phone holder is determining the correct tolerance values. The slot where the phone sits should be neither too tight nor too loose. A gap of 0.2-0.3 mm, common in FDM printing, is a good starting point for a comfortable yet secure fit. For the handlebar clamp, a tight fit should be aimed for, and a thin rubber gasket should be added to reduce vibration.
Print orientation makes a significant difference in durability. The arm section that holds the phone should be printed vertically rather than horizontally to prevent layer separation. Having layer lines perpendicular to the force direction in the most stressed area of the part significantly reduces the risk of breakage. Additionally, using at least 3-4 perimeters around screw holes prevents cracking under vibration.
Design Your Own Holder Step by Step
- Take measurements: Precisely measure your phone’s width, height, and thickness with a caliper. If you use a case, base your measurements on the phone with the case on.
- Check the handlebar diameter: Standard bicycle handlebars are 22.2 mm or 25.4 mm, while scooters typically have a 31.8 mm diameter. Design the clamp accordingly.
- Use rounded transitions: Add fillets and chamfers instead of sharp corners to increase impact resistance and reduce print stress.
- Print a quick prototype: Before finalizing the design, print a low-infill (15-20%) prototype to test fit and assembly. You can increase the infill ratio to 30-40% for the final version.
With these steps, you can produce a holder that is fully compatible with your bicycle or scooter. Once the design is complete, you can use our instant price calculator to find out the cost of your part.
Post-Processing and Assembly
After the part is printed, lightly clean the screw holes of the handlebar clamp if necessary. ASA or PETG surfaces do not require additional treatment for outdoor use; you can remove any roughness with fine sandpaper if desired. Adding washers under screw heads during assembly reduces the risk of cracking. If you’d like more inspiration for your project and to learn the right tolerance values, you can check out our tolerance guide for interlocking parts. With this information, you can have a durable and functional bicycle phone holder custom-made for your own vehicle.




 Türkçe
 العربية
 Русский
 فارسی
فارسی Deutsch