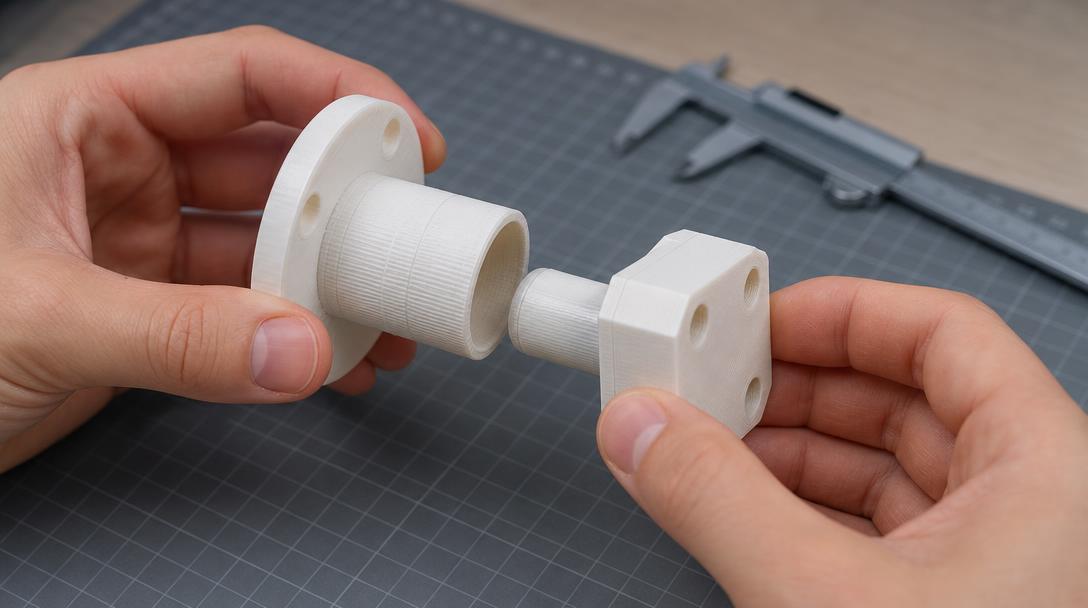
Fit Tolerance in 3D Printing: How to Design Interlocking Parts
Fit tolerance in 3D printing determines whether two parts designed to fit together will assemble smoothly. Using identical dimensions in the drawing is usually not enough; small variations caused by production and material can result in a fit that is too tight or too loose. The right approach is to set clearance according to the part’s function, then measure and adjust your first test print. This helps avoid unnecessary full-size prints and adjustments later.
Decide on the type of fit first
How the parts will join determines the tolerance to allow in the design. A cover that will be removed and reattached should not be designed using the same dimensional logic as a pin that will be fixed permanently in place. Choosing the type of fit from the outset reduces the number of test prints and makes design decisions clearer.
- Clearance fit: The parts fit together without force and can be separated when needed. Used for covers, guides and moving connections.
- Interference fit: Friction holds the parts together; assembly may require controlled force.
- Snap fit: A tab or flexible section holds the parts in place. The tab geometry and material flexibility should be considered together.
Why aren’t nominal dimensions enough?
The dimensions in a CAD model do not guarantee that the printed part will come out to exactly the same size at every point. Nozzle diameter, layer orientation, how the outer walls are formed, material buildup at corners and the part’s print orientation can all affect the result. Holes may appear narrower than their model dimensions, especially when printed horizontally. For this reason, it is risky to finalize fit dimensions based only on the values shown in the model.
Rather than using one universal clearance value, choose a starting range that suits the part’s size and function. Then print a small tolerance test: if the same test includes several clearance options, you can choose the right fit without reproducing the whole part. Measure with calipers where possible, and note the settings used for each sample. This gives you a practical reference for comparison in future designs.
How to adjust the fit reliably
- Define the function: Will the part stay fixed, be removed by hand, or move? How it will be used determines how tight the fit should be.
- Simplify the contact surfaces: Avoid unnecessary protrusions, chamfers or complex curves where the parts meet. Simple surfaces are easier to measure and check for potential issues.
- Consider print orientation: The relationship between the fit surface and the layers can affect both dimensions and strength. Take the effect of print orientation on part strength into account at the design stage.
- Print a small test: Try different clearance options on the same part, and assess the assembly feel and dimensions together. Printing the test in the same orientation as the actual part makes the results more meaningful.
- Consider the conditions of use: Temperature, load and frequent assembly and disassembly can cause the fit to loosen or become harder over time.
Material and production decisions
Changing materials can also change flexibility and surface behavior, so a fit verified with one filament may not produce the same result with another. It is important to choose materials for functional parts according to their intended conditions of use. You can review the information on the 3D printing materials page when considering suitable options. If the design needs to bear a load or flex, review the part geometry as well as the material.
If your file is ready, reviewing the fit surfaces and dimensional tolerances with a specialist before production can reduce the risk of needing another print. Testing critical dimensions with a small sample before printing can help you see how the design will assemble. You can check an estimated price based on the part’s dimensions using the 3D printing price calculator.
A quick checklist
Can you assemble and remove the part without forcing it? Are there any burrs or noticeable layer protrusions on the fit surfaces? Does the part stay in place during use without becoming loose? Answering these questions with a small test sample helps you get closer to the right dimensions before printing a full-size part in most designs. When you make a change, print a new test under the same conditions as the previous one; this makes it easier to compare the effect of the clearance adjustment.


 Türkçe
 العربية
 Русский
 فارسی
فارسی Deutsch