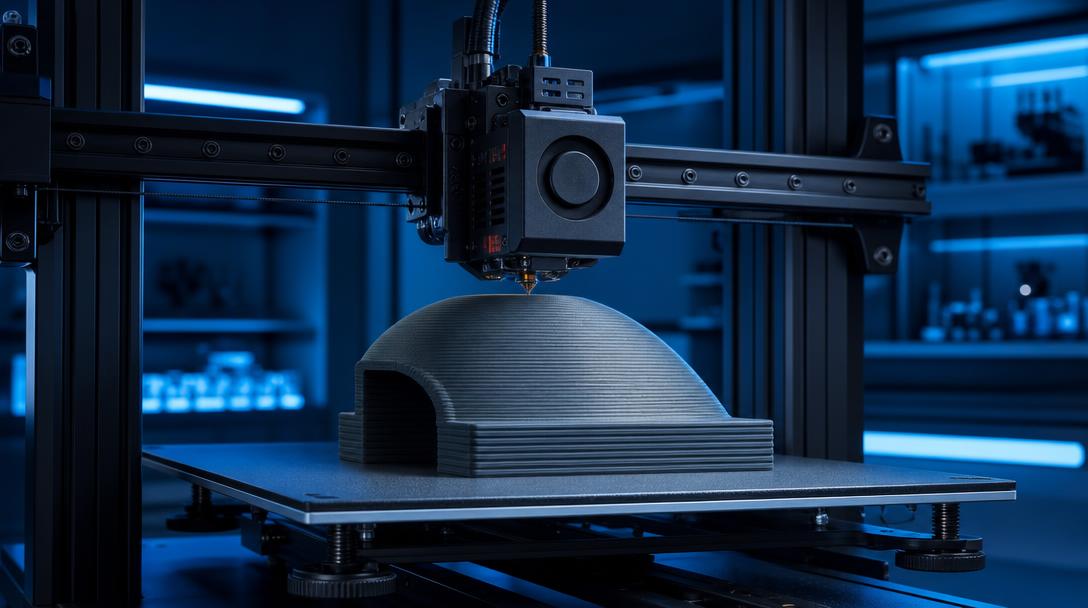
Adaptive Layer Height: Gain Detail and Speed at the Same Time
Adaptive layer height is a slicer feature that selects different values according to the geometry instead of using the same layer thickness throughout the model. By using thinner layers on curved and sloped surfaces and thicker layers on flat, simple areas, you can preserve surface detail while reducing the total print time.
How Does Adaptive Layer Height Work?
In a standard FDM print, the entire model is sliced, for example, with a 0.20 mm layer height. This method is easy and predictable; however, not every area requires the same level of detail. Vertical walls or large flat surfaces can be printed comfortably with 0.20 or 0.28 mm layers, while thicker layers on domes, sloped covers, and curved surfaces can create pronounced stair-step marks.
In adaptive mode, the slicer analyzes the surface slope and makes the layers thinner where needed. For example, it may use 0.24 mm on a flat body and 0.12 mm on a curved upper section. This produces cleaner results on critical surfaces without making you pay the long print-time cost of printing the entire part at a low layer height.
Which Prints Benefit from It?
- Curved and sloped surfaces: Reduces visible layer steps on spheres, domes, cylindrical transitions, and rounded covers.
- Visual prototypes: Helps produce smoother surfaces when presenting a product’s exterior appearance to a customer or design team.
- Large models: Can limit print time and filament consumption by using thicker layers in broad areas that do not require detail.
- Models and decorative parts: Can provide better visual resolution in areas such as text, raised details, or curved logos.
Especially in prototype production, this setting creates a practical balance between appearance and delivery time. However, adaptive layer height does not automatically make every part more durable. For strength, material, wall count, print orientation, and infill percentage must also be evaluated separately.
What Should You Consider When Adjusting It?
First, take your printer’s nozzle diameter and safe layer range into account. With a 0.4 mm nozzle, approximately 0.12-0.28 mm is a practical starting range for most FDM jobs; however, your manufacturer profile and filament settings may differ. Very thin layers can increase print time and make small errors in temperature, cooling, or flow settings more noticeable.
- Import the model into the slicer and check the preview with the standard layer height.
- Enable the adaptive or variable layer height tool.
- Increase layer density in sloped areas, but do not make flat surfaces thinner than necessary.
- Inspect the preview for sudden layer changes, gaps, or surface defects.
- If necessary, manually adjust critical areas and make a small test print.
For a more basic explanation of how layer height affects surface quality, you can take a look at our layer height guide. This will help you set the lower and upper limits used in adaptive mode more consciously.
Is This Setting Used When Ordering an FDM Print?
Adaptive layer height is a slicing preference evaluated according to the purpose of the model. It can be useful when appearance is the priority for a decorative cover, presentation prototype, or curved enclosure. However, for a functional part, looking only at surface smoothness is not enough; fit tolerance, screw holes, and load direction must also be checked.
If you would like an assessment of your file’s print time and production approach, you can review the options available through our FDM 3D printing service. If your design is ready, you can also use the instant price calculation tool to see the estimated cost before production.
When applied correctly, adaptive layer height lets you invest in quality only where it is needed instead of printing every area with the finest setting. This provides a more balanced FDM printing workflow, especially for curved models.


 Türkçe
 العربية
 Русский
 فارسی
فارسی Deutsch