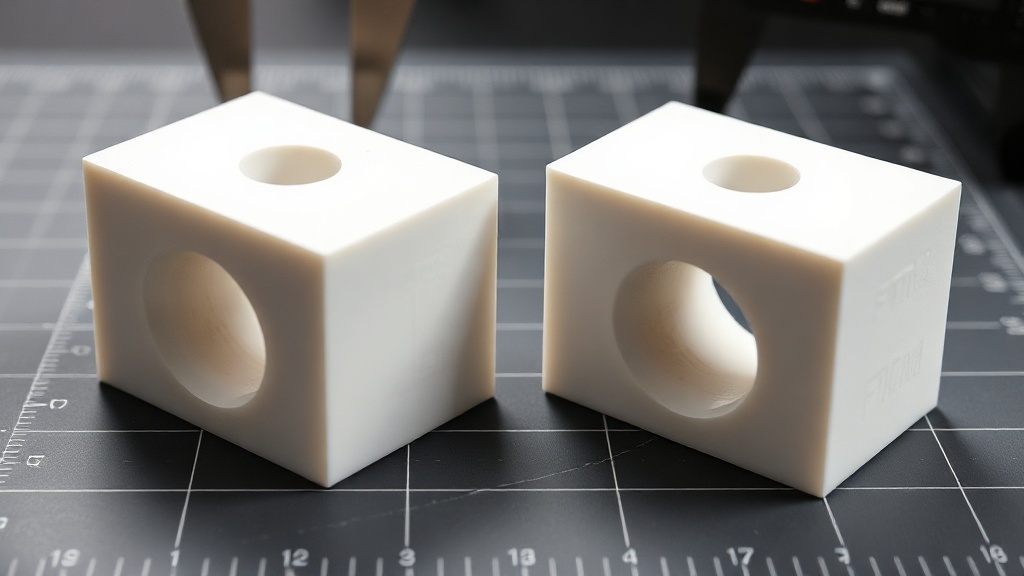
Why Do Horizontal Holes Come Out Oval? Achieving Exact Dimensions with Hole Compensation in FDM Printing
If the 5 mm hole you drew in your design refuses to accept a drill bit after printing, you are not alone. In FDM printing, holes almost always come out slightly smaller than designed — and on top of that, horizontal holes (printed as bridges) take on an oval shape. In this article we explain why this happens and how to prevent it using a hole compensation print approach.
Two Separate Causes of Hole Shrinkage
To solve the problem, you first need to separate two distinct effects:
- Circular shrinkage: Molten filament flows and contracts slightly toward the inside of the wall. As a result, the diameter of round holes printed on the vertical axis ends up a few tenths of a millimetre smaller than designed.
- Bridging sag: In a horizontal hole, the upper semicircle is printed unsupported in mid-air. The hot filament droops downward and the top of the circle flattens out — resulting in the classic “D” or oval appearance.
Practical Methods for Compensation
The good news is that these deviations are predictable, meaning they can be accounted for in the design beforehand.
- Increase the diameter: Add 0.2–0.4 mm of allowance to critical holes in the design. The exact value varies by material and machine — test once and note your own compensation amount.
- Rotate the hole to vertical: Where possible, orient the part so the hole axis is perpendicular to the print bed. This eliminates the bridging problem entirely.
- Use a teardrop profile: If a horizontal hole is unavoidable, add a small triangular peak on top — this removes the unsupported bridge span and the hole retains its shape.
- Post-process: For precision fits, printing the hole slightly undersized and then bringing it to exact dimension with a drill or reamer is the most reliable method.
Which Method, When?
For precision fits such as screw seats and guide pins, post-processing gives the cleanest result. For high-volume parts, embedding the compensation allowance directly in the model saves time. For decorative holes, no precautions are usually needed.
If you are unsure how critical the tolerances are in your part, you can share your model via the pre-order form and request guidance on hole compensation. Let’s work out the best approach together.


 Türkçe
 العربية
 Русский
 فارسی
فارسی Deutsch