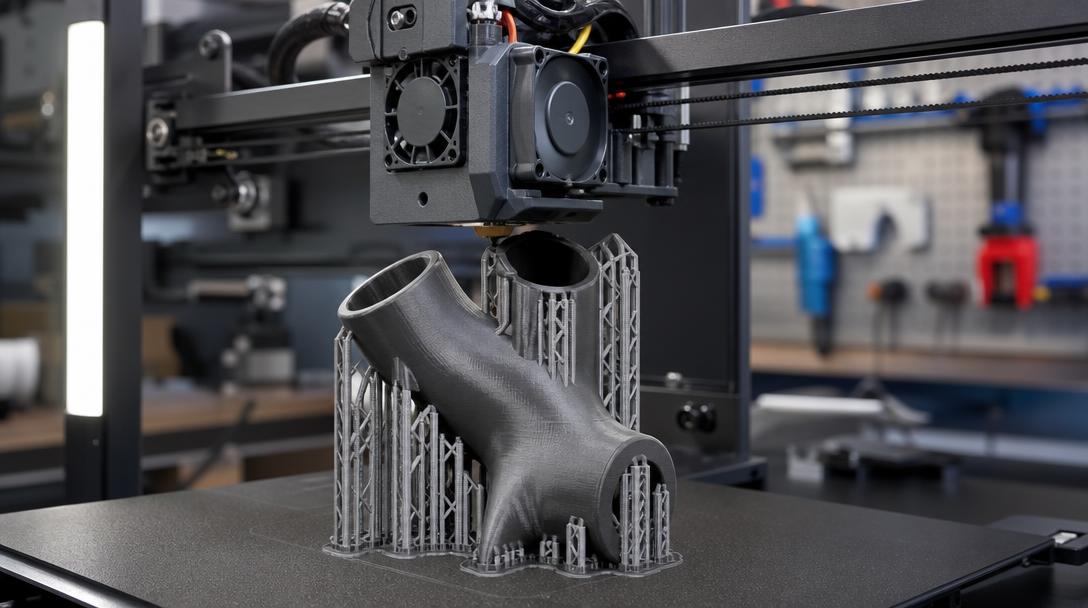
Bambu Studio support settings: How to Set Up Supports That Come Off Cleanly Without Leaving Marks
Bambu Studio support settings keep the part stable without damaging the surface when configured correctly. Especially on overhanging, hollow, or complex forms, the goal is not just to keep the print standing; it is to balance support contact, ease of removal, and final surface quality together.
That is why support settings should not be treated like simply turning a single checkbox on or off. Part orientation, support type, contact gap, and density should all be considered together. The same logic also applies when getting a 3d printing service for a custom fixture, prototype, or functional part: supports that come off cleanly mean less sanding and more predictable results.
First answer this question: Is support really necessary?
Before enabling supports in Bambu Studio, reorienting the part often gives better results. Unnecessary support increases both print time and the risk of leaving marks on the bottom surface. Especially instead of placing wide support under a flat surface, rotating the model by 30-45 degrees can produce a cleaner result. This approach is also consistent with the core logic in the guide When Are Support Structures Necessary in 3D Printing?.
Normal support or tree support?
In Bambu Studio, two main approaches stand out:
- Normal support: More controlled for parts with flat surfaces and important mechanical accuracy.
- Tree support: Can leave fewer marks on organic forms, sculptural parts, and areas where minimal contact is preferred.
The general rule is this: normal support makes more sense for wide flat ceilings, while tree support is more suitable for curved areas and local contact points. However, tree support is not always better; thin branches can sometimes create vibration at small contact points.
The 4 most critical settings for supports that do not leave marks
1) Top Z Distance
If the vertical gap between the support and the part is too small, the support fuses as if it is welded on; if it is too large, the bottom surface sags. In PLA, choosing a reasonable range based on layer height is usually the safest approach. If you are printing at 0.20 mm layer height, setting the support one step too tight usually creates unnecessary marks.
2) Support Interface
When the interface layer is enabled, the support surface becomes more regular. Especially on parts where the bottom surface will remain visible, the interface should not be turned off. Even if the main body of the support stays rough, this setting makes the area touching the part more controlled.
3) Density
Low density makes removal easier, but it may be insufficient on wide bridges. Very high density, on the other hand, makes the supports almost as rigid as a second part. On most FDM parts, medium support density is a more balanced choice for both safe printing and easy removal.
4) XY Distance
If the support gets too close to the side walls, it leaves marks especially around hole openings and outer contours. When this horizontal distance is left slightly more generous, the part comes out cleaner. In jobs with tight tolerance sensitivity, this difference is very noticeable; when needed, the labor time spent afterward can matter just as much as affordable 3d printing prices.
Which approach makes more sense for which part?
- Visual prototype: Tree support + low contact + correct orientation
- Functional fixture: Normal support + interface on + controlled density
- Mechanical part with holes: Pay attention to XY distance, and reorient the model if necessary
- Speed-focused print: Splitting the part can sometimes be more efficient than using support
On custom production parts, support settings directly affect cost; less support means shorter print time and less post-processing. If you want to clearly see a model’s support needs or compare production times, it is useful to use the instant pricing approach on the online 3d printing page as a reference.
A common mistake
The most common mistake is looking for the cause of poor surface quality only in support density. In reality, most problems come from incorrect part orientation, contact gaps that are too close, or unnecessary use of support. Changing the orientation first, then the support type, and only finally the fine settings gives faster results.
In short, getting clean-removing supports in Bambu Studio does not come from one magic setting; it becomes possible with the right support type, a reasonable contact distance, and smart part orientation.


 Türkçe
 العربية
 Русский
 فارسی
فارسی Deutsch