What Should the 3D Printing Infill Percentage Be? A Guide for Models, Standard and Mechanical Parts
What infill percentage should you use in 3D printing is one of the most common questions, especially for those printing parts for the first time. The infill percentage determines how dense the internal structure of your part will be and directly affects the balance between strength and cost. At Ucuz3D, as part of our 3D printing service using FDM technology, we determine the most suitable infill percentage for each part and offer recommendations to our customers.
So which percentage should be used when? Here is a practical infill percentage guide based on usage purpose.
What Is Infill Percentage and Why Does It Matter?
Infill percentage refers to what percentage of the interior of a 3D printed part is solid. This value directly affects the part’s weight, strength, print time, and cost. Choosing the wrong infill percentage leads either to unnecessary material consumption or a weak part. The right choice, on the other hand, gives you a result that is both economical and functional.
For Decorative Parts and Models: %5–%10
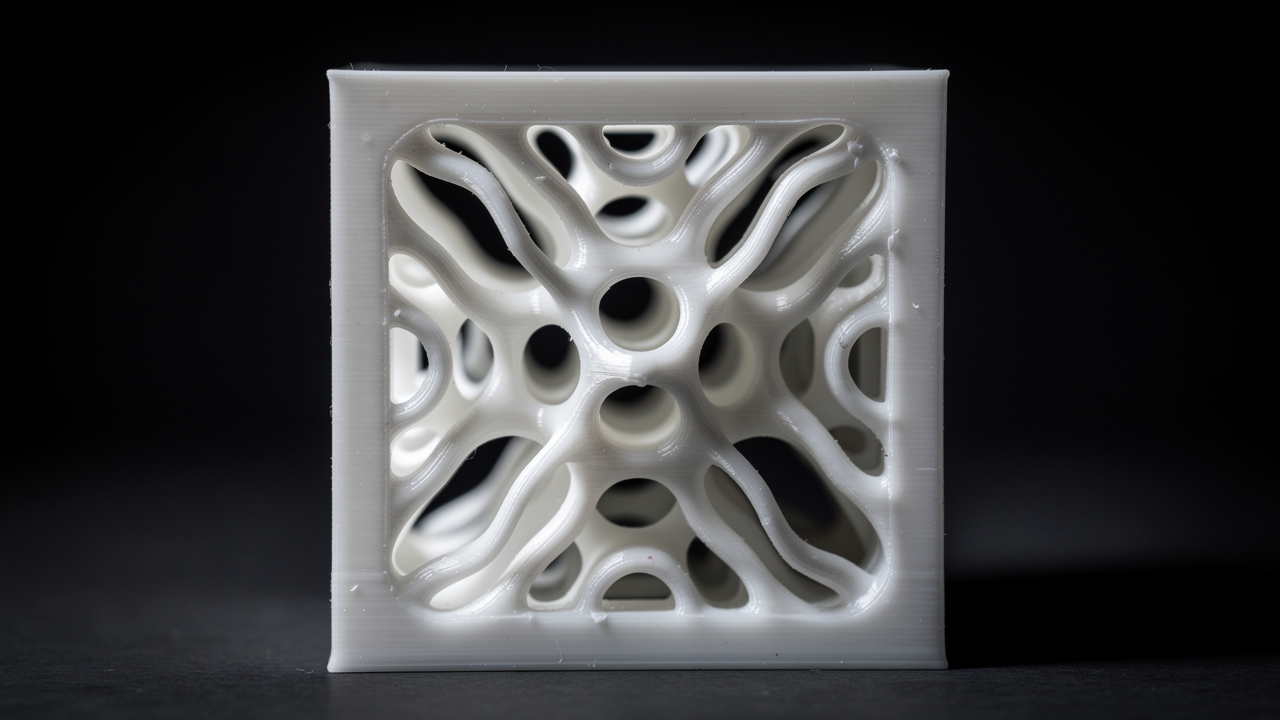
Visually-oriented prints do not require a high infill percentage. Figurines, models, ornaments, desktop accessories, and costume parts can be easily printed with %5–%10 infill. This keeps filament consumption to a minimum, shortens print time, and significantly reduces cost. For decorative parts, the gyroid or grid pattern provides sufficient internal structure.
For Everyday Use Parts: %15–%25
For parts that carry light loads and are used occasionally, %15–%25 infill is ideal. Phone cases, small enclosures, office accessories, cable organizers, and simple molds can be safely printed in this range. The grid or gyroid pattern offers the best strength-to-weight ratio in this range, while the triangles pattern is more suitable for horizontal loads.
For Functional Parts: %30–%60
Parts that require strength need a higher infill percentage. Brackets, connection fittings, gears, tool holders, shelf connectors, and similar mechanical parts should be printed in the %30–%60 range. For parts that will operate under load, %50 infill provides the best balance between strength and cost. In this range, gyroid or cubic patterns are recommended as they offer equal strength in all directions.
For Industrial Parts: %80–%100
Workpieces requiring maximum strength — vices, fixtures, press molds, and impact-resistant parts — should be printed with %80–%100 infill. At these percentages, the part becomes nearly completely solid and achieves maximum strength. When combined with high infill using engineering materials such as nylon (PA), polycarbonate (PC), or carbon fiber reinforced filament, industrial-quality parts can be obtained. For durable parts, you can check out our 3D printing with engineering materials service.
Infill Pattern Selection
Choosing the right pattern is just as important as the infill percentage. The most common infill patterns and their use cases are as follows:
- Gyroid: Equal strength in all directions, best overall performance. Ideal for everyday and functional parts.
- Grid: Fast printing, good strength. Sufficient for decorative and light-load parts.
- Cubic: Three-dimensional strength, suitable for mechanical parts.
- Triangles: Strong under horizontal loads, ideal for brackets and connections.
- Honeycomb: Efficient weight-to-strength ratio, suitable for models and prototypes.
- Lightning: Fastest print, least material. Only for decorative parts.
Infill Percentage and Cost Relationship
As the infill percentage increases, filament consumption and print time increase in parallel. A part at %20 infill uses approximately %40 less filament than %100 infill and finishes %30 faster. Therefore, determining your part’s actual strength requirements is critical for avoiding unnecessary cost. You can find the optimal balance by experimenting with different infill percentages in your slicing software. To see the impact of different infill percentages on cost, use our instant price calculator tool.
Common Mistakes
One of the most common mistakes is printing all parts at %100 infill. This leads to unnecessary filament consumption and long print times. Another mistake is printing parts that require strength at too low an infill, causing them to break during use. Determining the intended use of the part beforehand and choosing the appropriate infill percentage prevents these mistakes.
Choosing the right infill percentage is the key to getting the most out of 3D printing. By determining the intended use of your part and selecting one of the ranges above, you can achieve a print that is both durable and economical. If you are having trouble determining the most suitable infill percentage for your project, the Ucuz3D expert team would be happy to help you. Upload your STL file, and we will create an instant price quote with the most suitable infill percentage and material option for you.


 Türkçe
 العربية
 Русский
 فارسی
فارسی Deutsch